Step 1 – Create a free Google Cloud Account.
Step 2 – Visit the Google Cloud Homepage and click + Create Project:

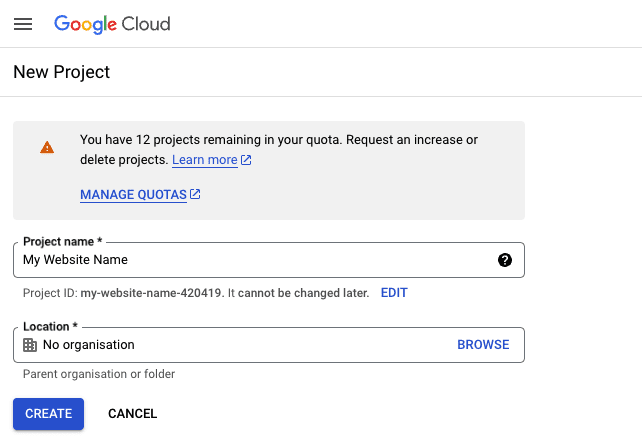
Step 3 – Set a project name and click Create :
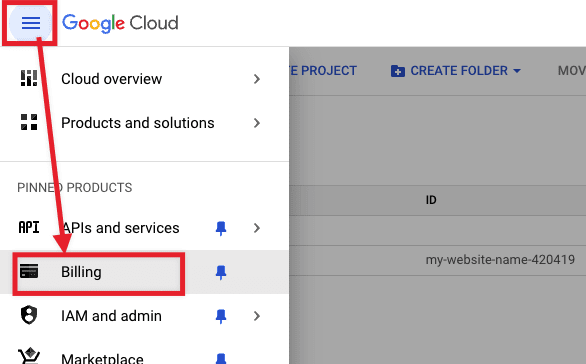
Step 4 – Click the Hamburger Icon > Billing and make sure to add a Billing Account. Skip this step if you already have a billing account setup:
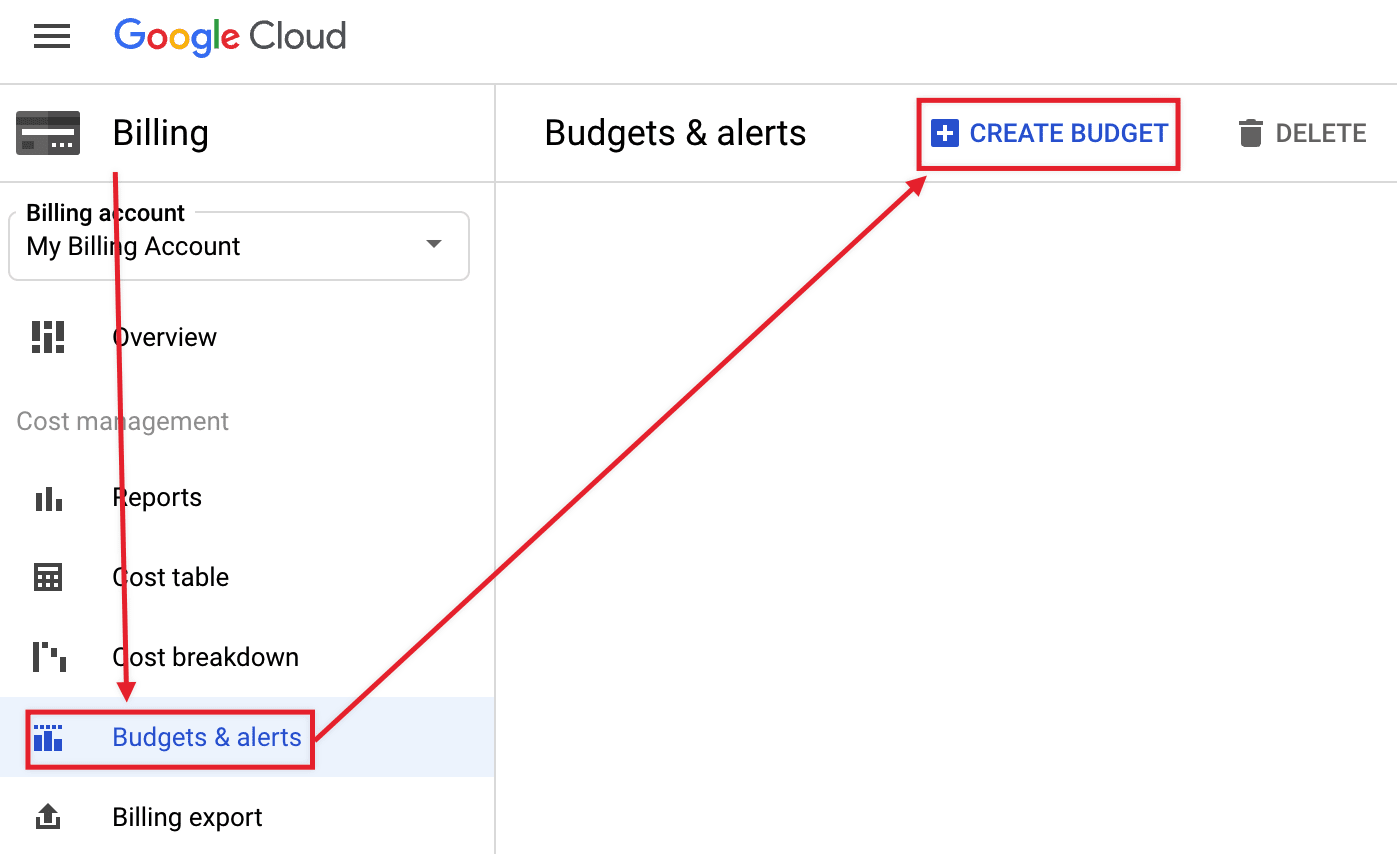
Step 5 – (Optional) Your can setup a Budget Alert to avoid surprise on your billing when charges exceed a certain amount :
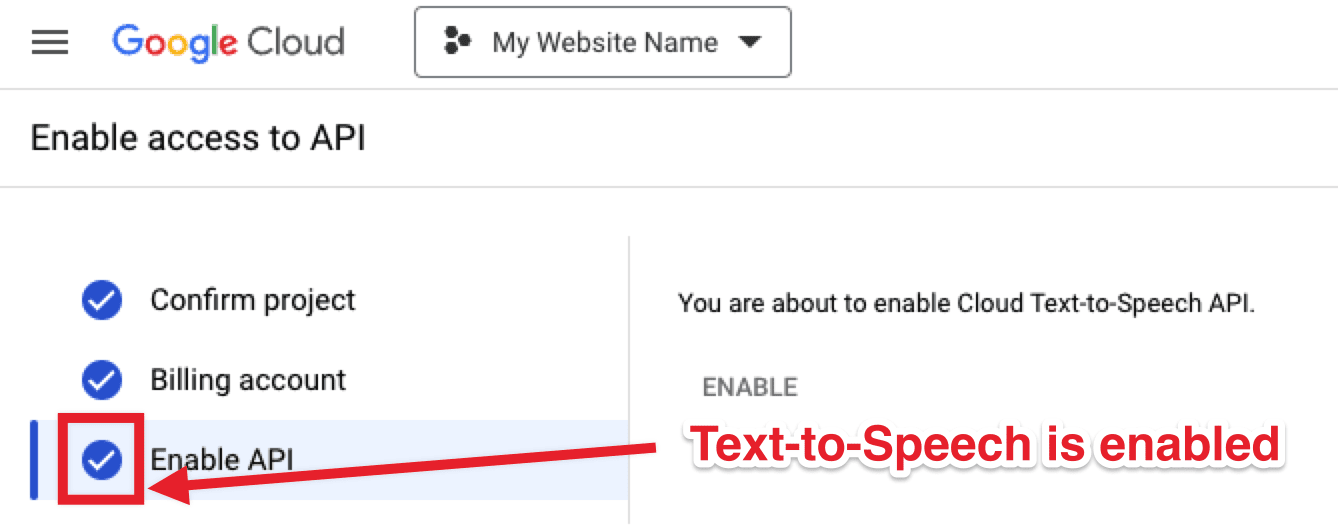
Step 6 – Enable Text-to-Speech API by clicking here and follow the on-screen instructions.

Once you see the blue icon beside Enable API, it means you have enabled Cloud Text-to-Speech API :
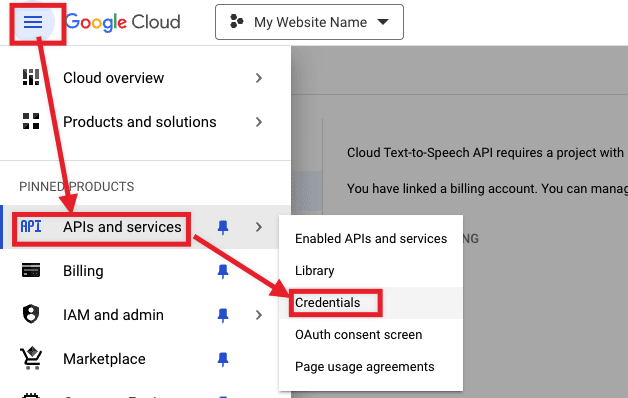
Step 7 – Click the Hamburger Icon and go to APIs & Services > Credentials:
Step 8 – Click + Create Credentials and choose Service Account:

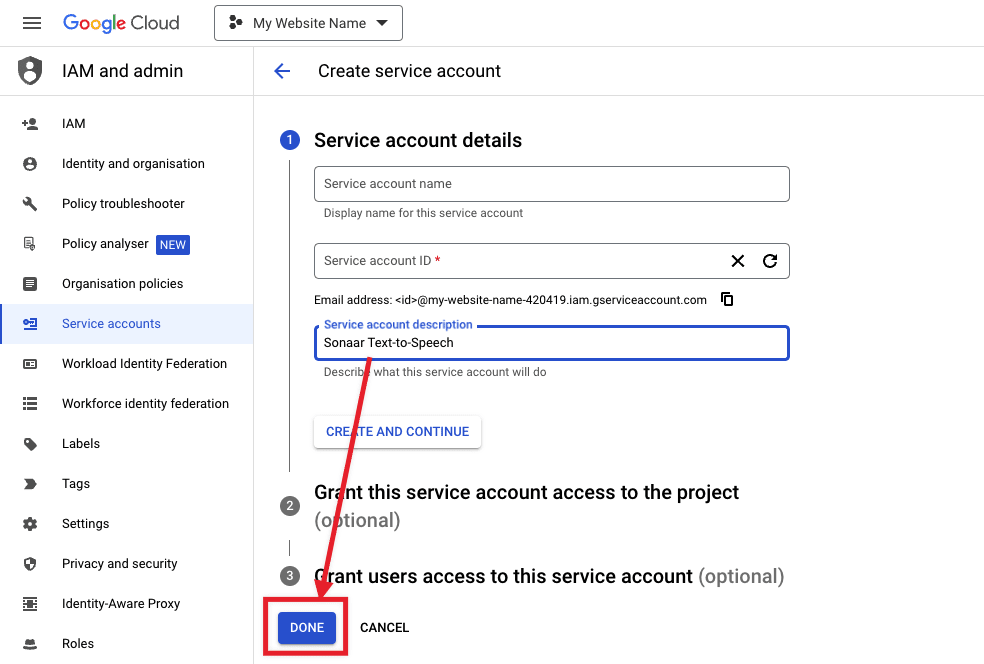
Step 9 – Enter any Service account name and description and click DONE :
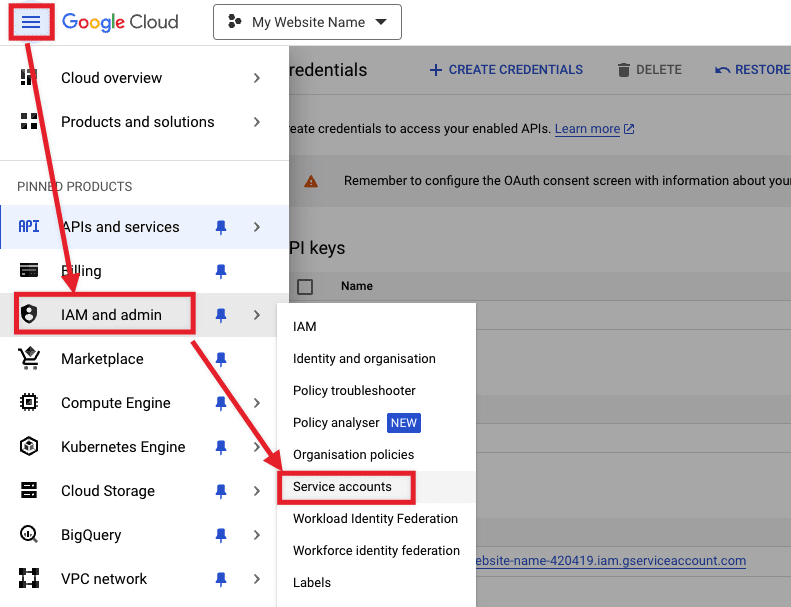
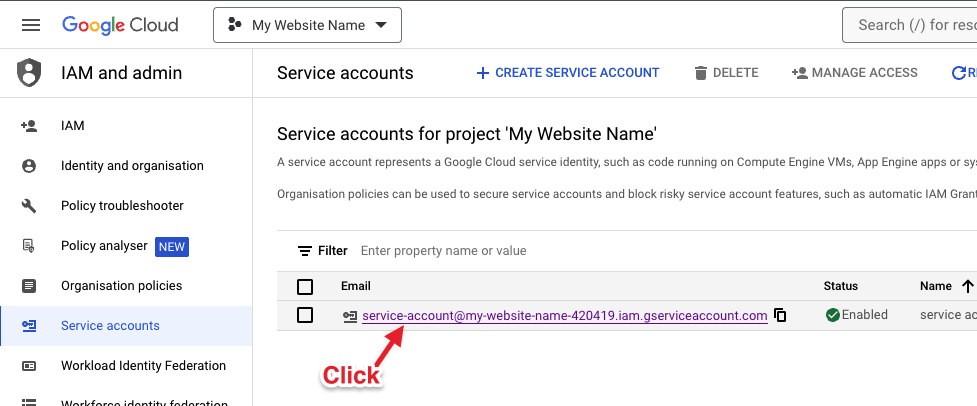
Step 10 – Click the Hamburger Icon and go to IAM and admin > Service accounts:
Step 11 – Click the service account link you have created:
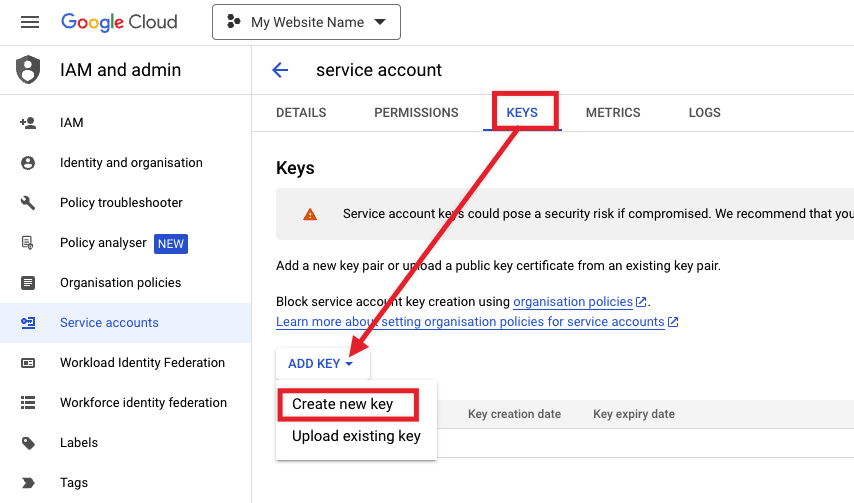
Step 12 – Click the KEYS tab. Then Click ADD KEY > Create new key:
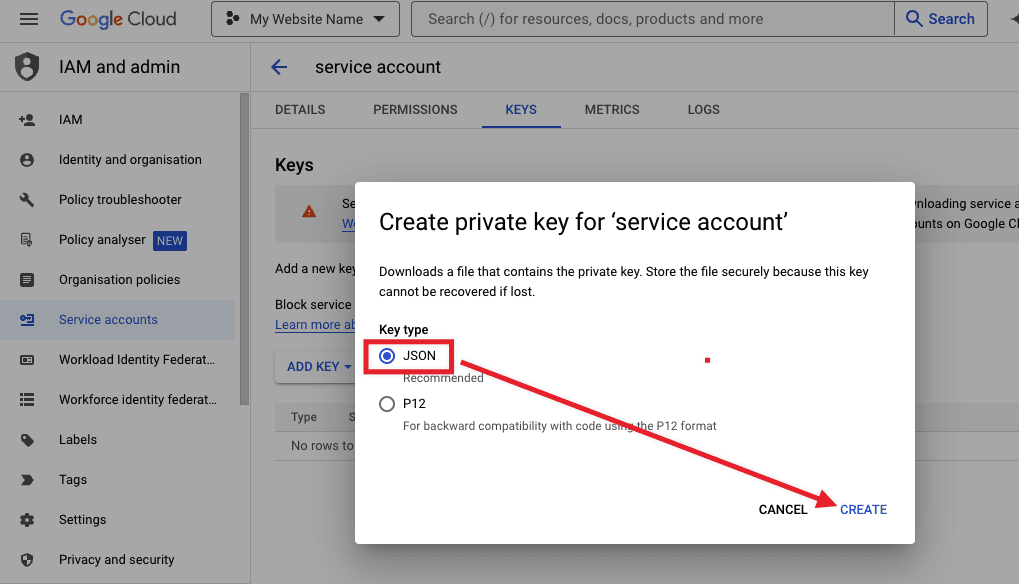
Step 13 – Select JSON then click CREATE. Download then .json file on your computer:
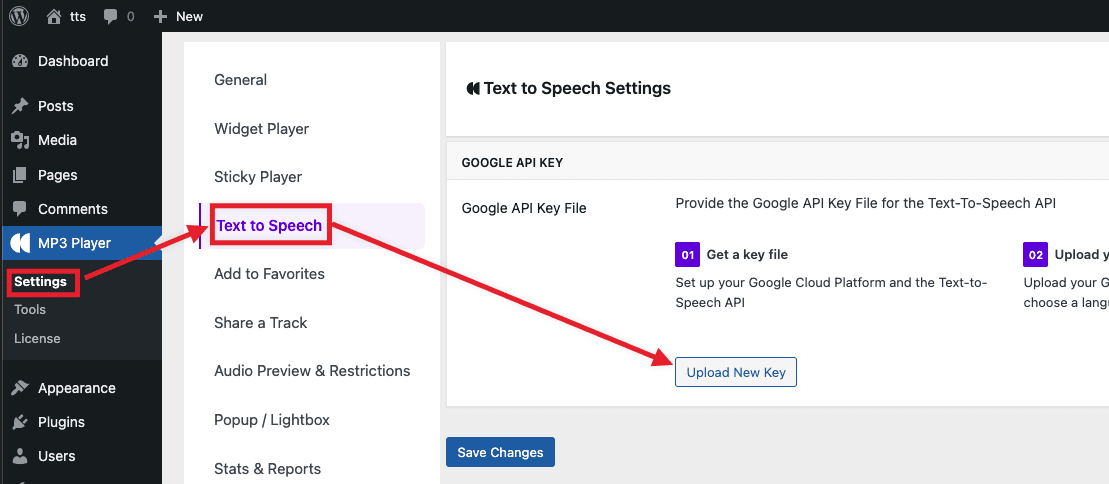
Step 14 – Go to your WordPress Dashboard > MP3 Player > Settings > Text To Speech, and click Upload New Key:
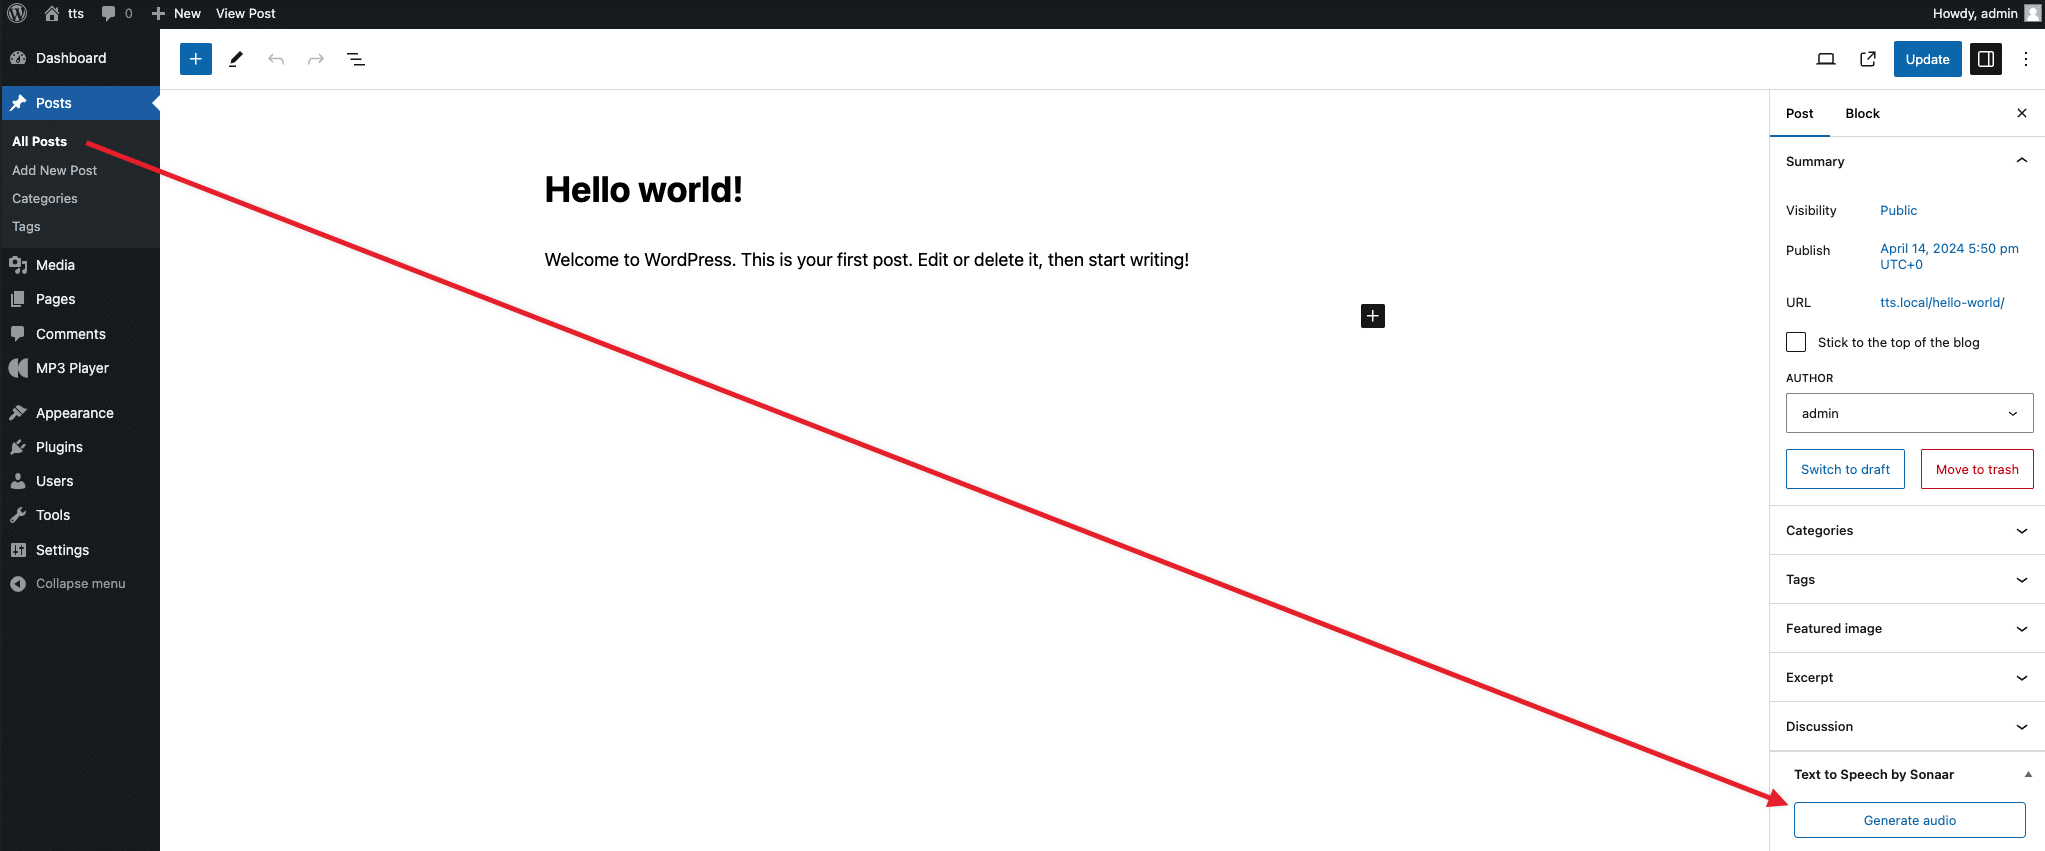
Step 15 – You are all set! Edit a post and click Generate Audio Button located in the left side bar.